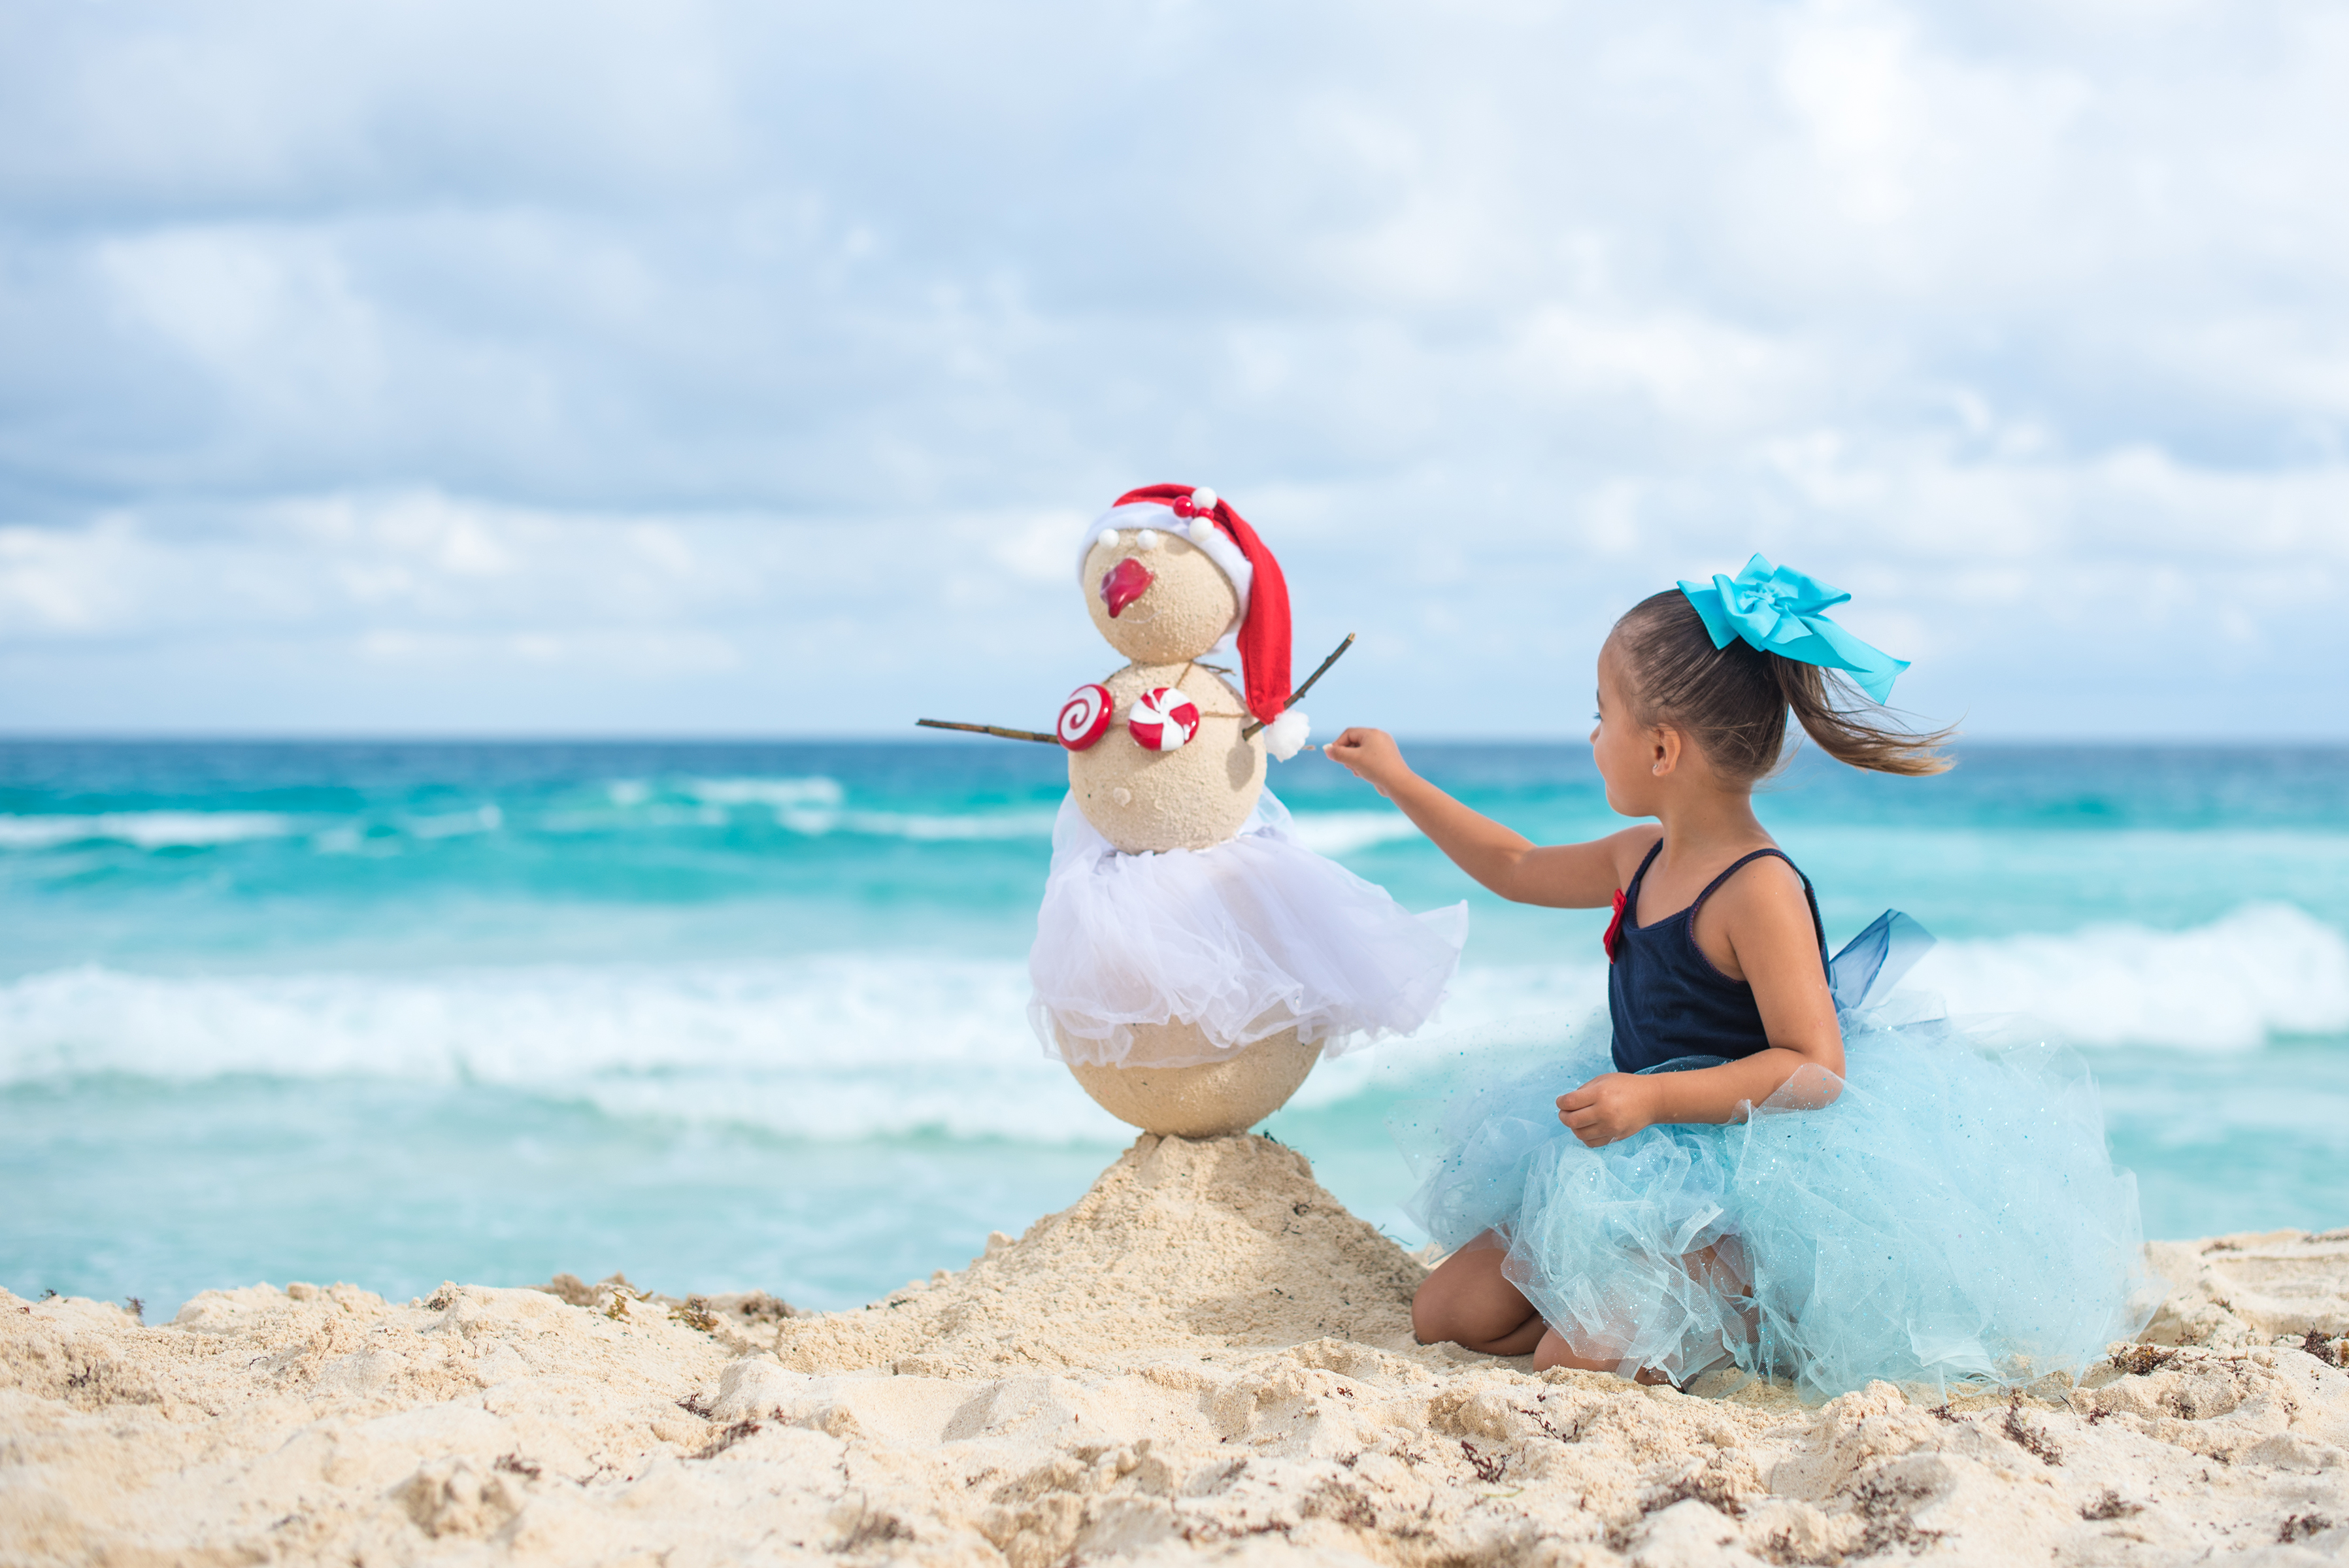
We live in Mexican paradise and the beach is genuinely one of our happy places so it’s also where we gravitate to for photoshoots. Each December I try and plan a fun & special Christmas shoot of my daughter Isla. Last year I did an adorable session with her on the beach using a small decorated Christmas tree & wrapped gifts. I’m not a fan of photos done in a studio, I don’t like doing the same thing twice AND I’m not really one for simply copying whatever Pinterest photo is trending right now (or if I did I’d definitely have to give it my own twist). I like to try and come up with something original and I had the idea to make a large Cancun “snowman” out of sand for my daughter to pose with. Had I seen someone else’s photos with one? Nope. Did I know how to make a giant Sandman? Nope. But that’s what was going to make it all more fun!
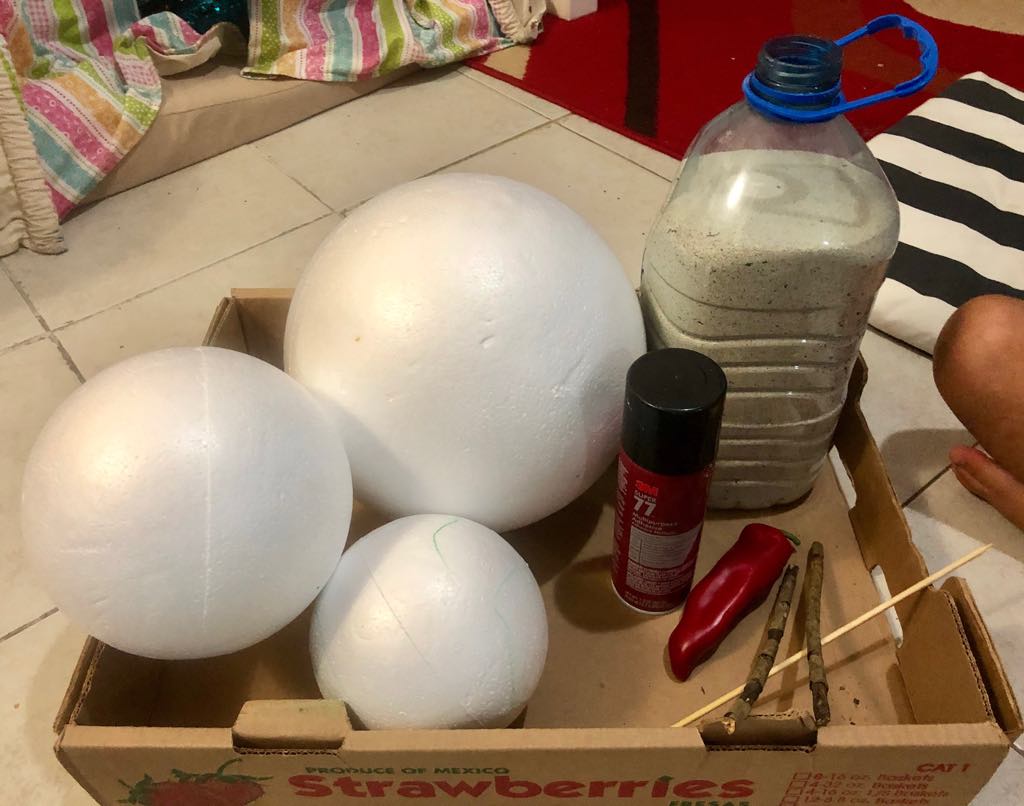
Cancun sand is gorgeous but I also find it super powdery soft so building large sand castles can sometimes be a little challenging…especially trying to make something lifesize. Two years ago I had made a very small sand family with a little creativity so my only idea to go off of was to use the same technique I did for them but on a much larger scale. Here’s the materials I used to make our toddler size Cancun Sandman…
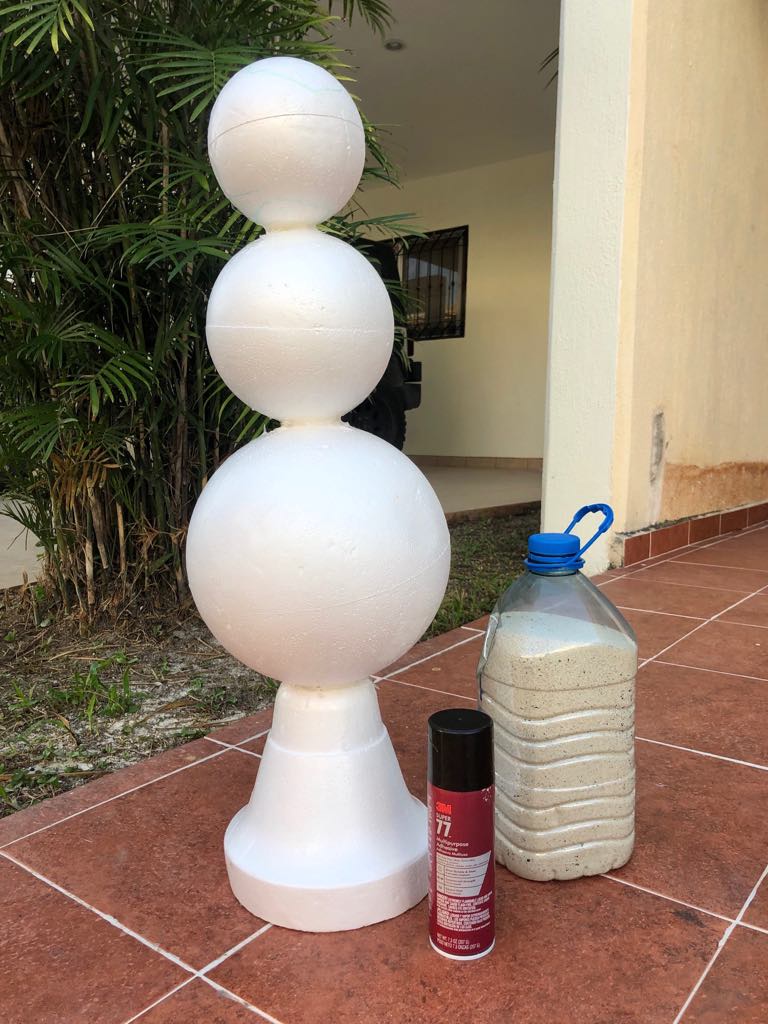
Materials
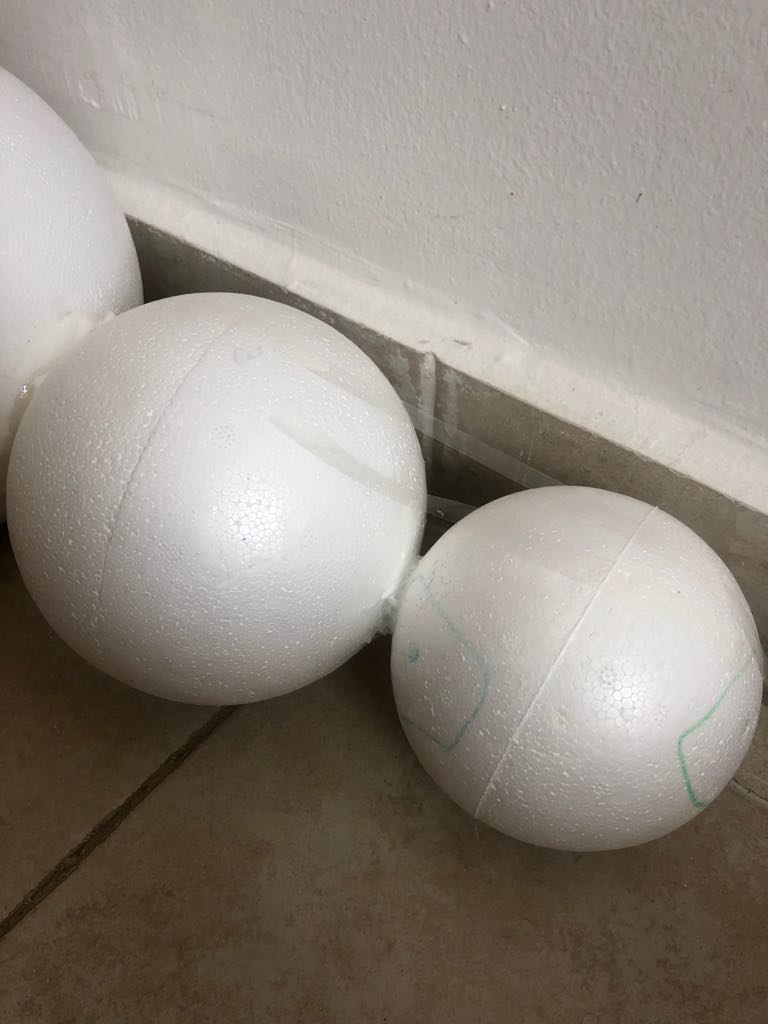
- 3 different sized styrofoam balls for the bottom, midsection & head
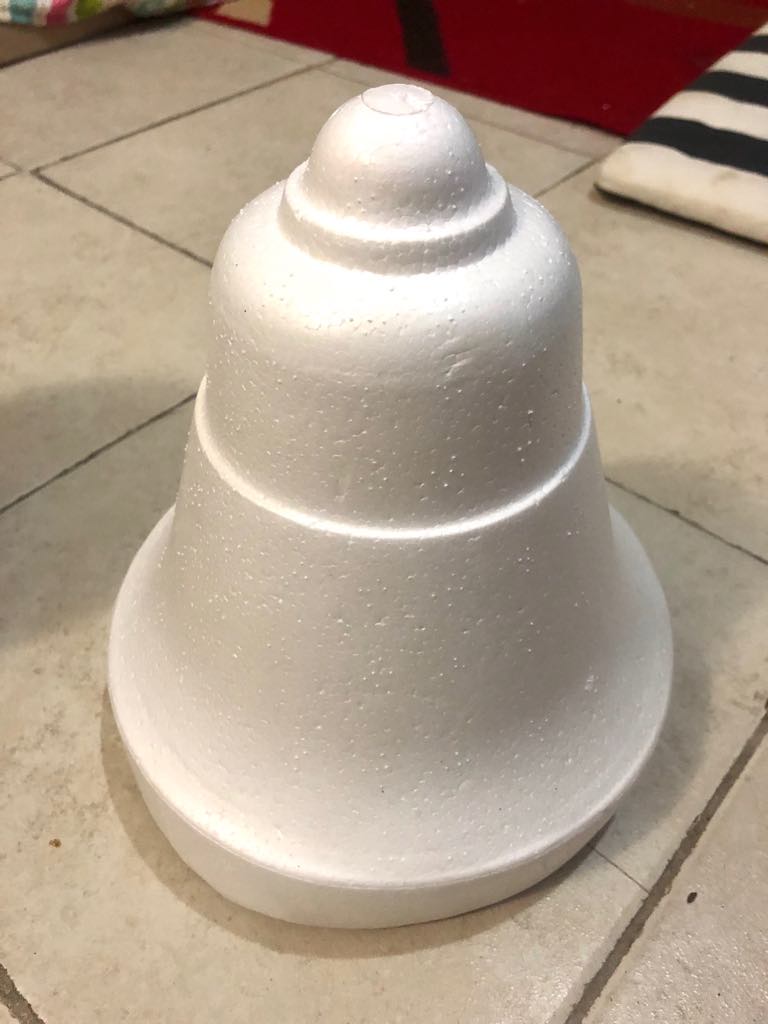
- 1 styrofoam bell to use as the base
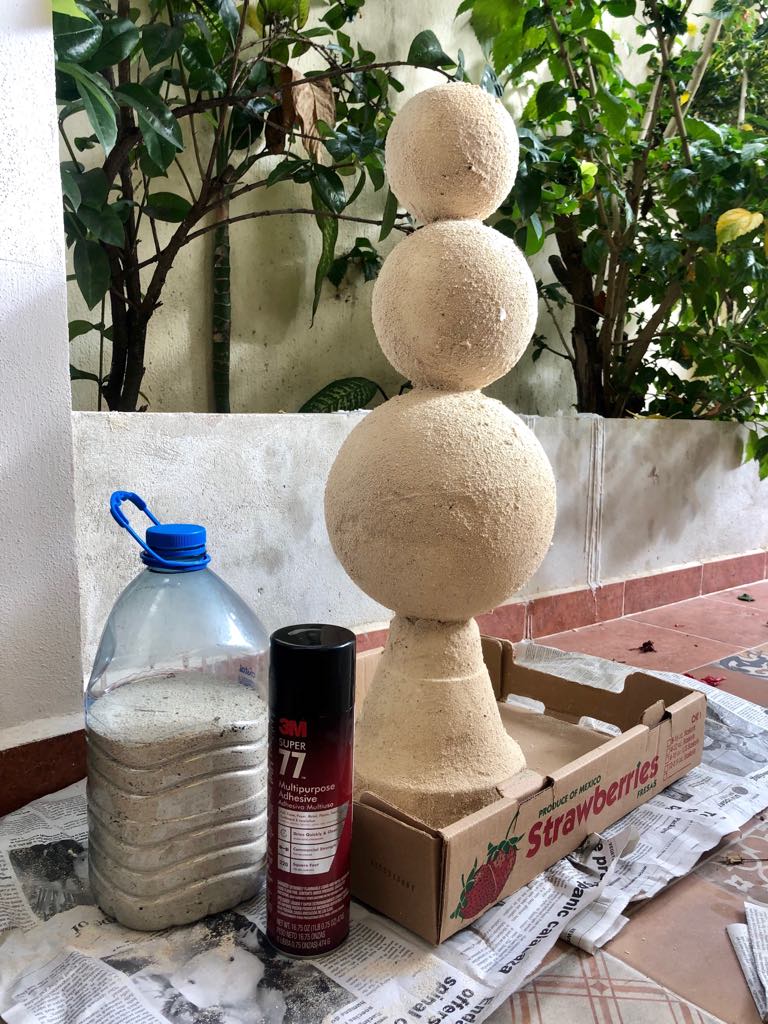
- spray adhesive (3M)
- glue gun
- scotch tape
- newspaper
- box
- plastic cup
- one wooden dowel
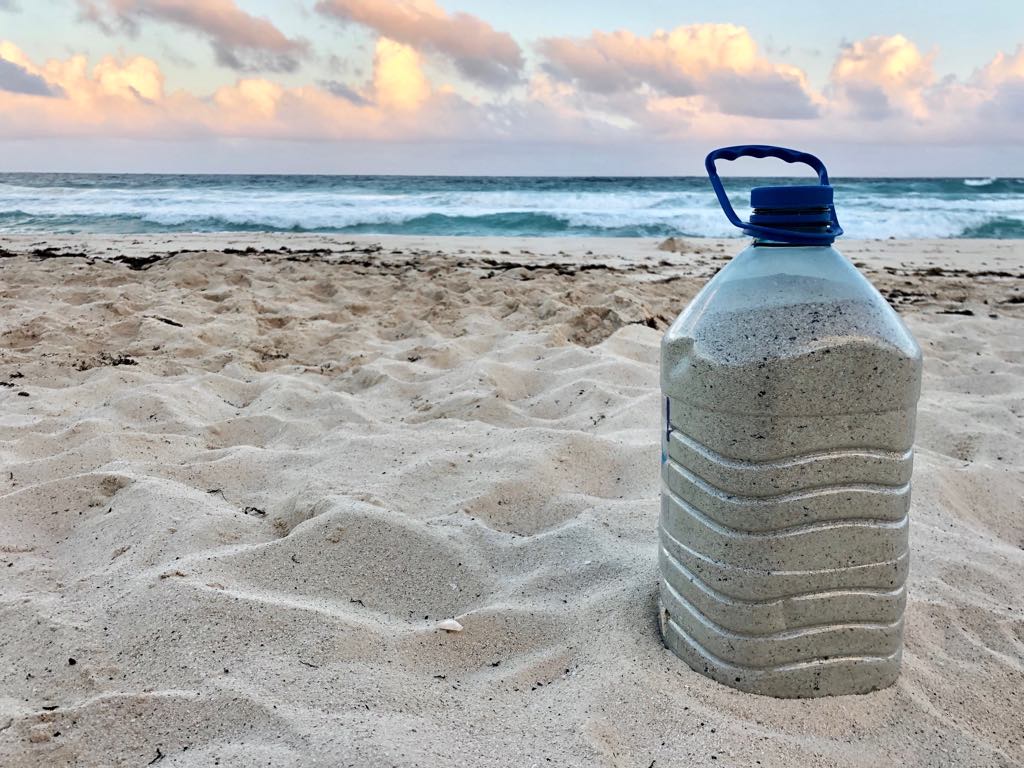
- sand (I filled a 5L jug of sand but only used about 2L)
- sticks for arms
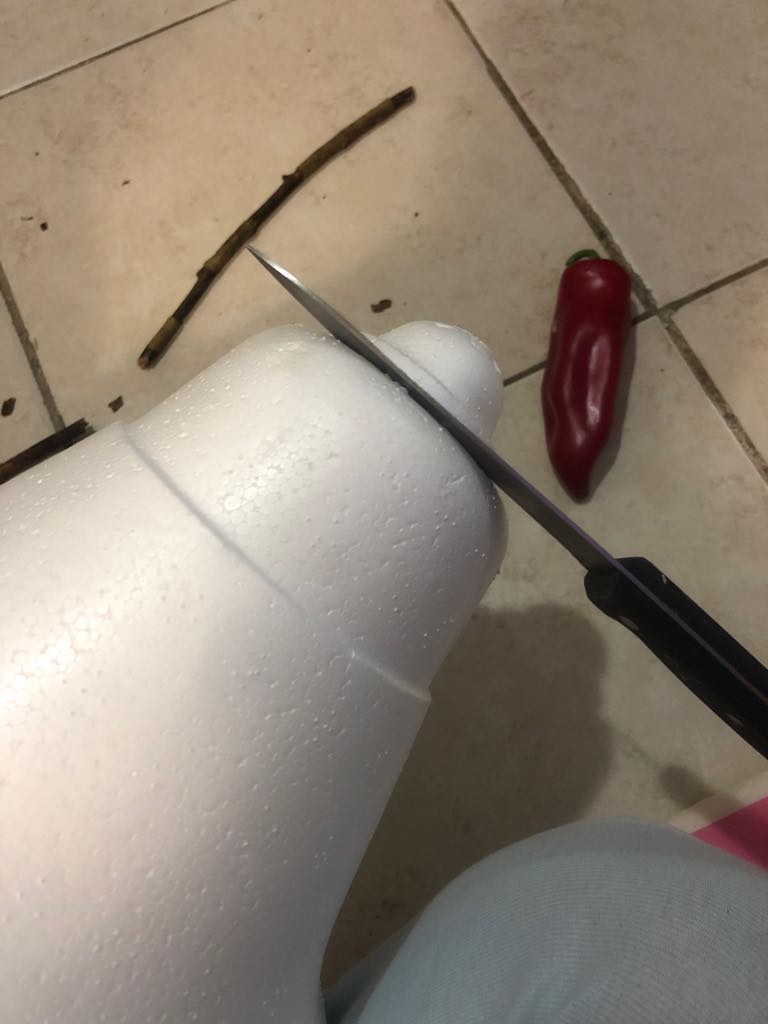
- Sandman/girl props (for our Sandgirl we used…large plastic candy pieces & jute twine for the bikini top, small crafting balls for the eyes, a chilli pepper for the nose (from a crafting store), a Santa hat, red & white plastic candy pieces to decorate the hat, a tutu & sticks for arms)
Step #1-Making your Sandman body
You’ll need to fasten your styrofoam balls together to at least sit overnight so you have a good base to work with. I used small pieces of a wooden dowel first to stick two balls together at a time and then strengthened with a hot glue gun. I wasn’t too worried about the glue showing because I knew I’d later be coating the entire Snowman with sand.
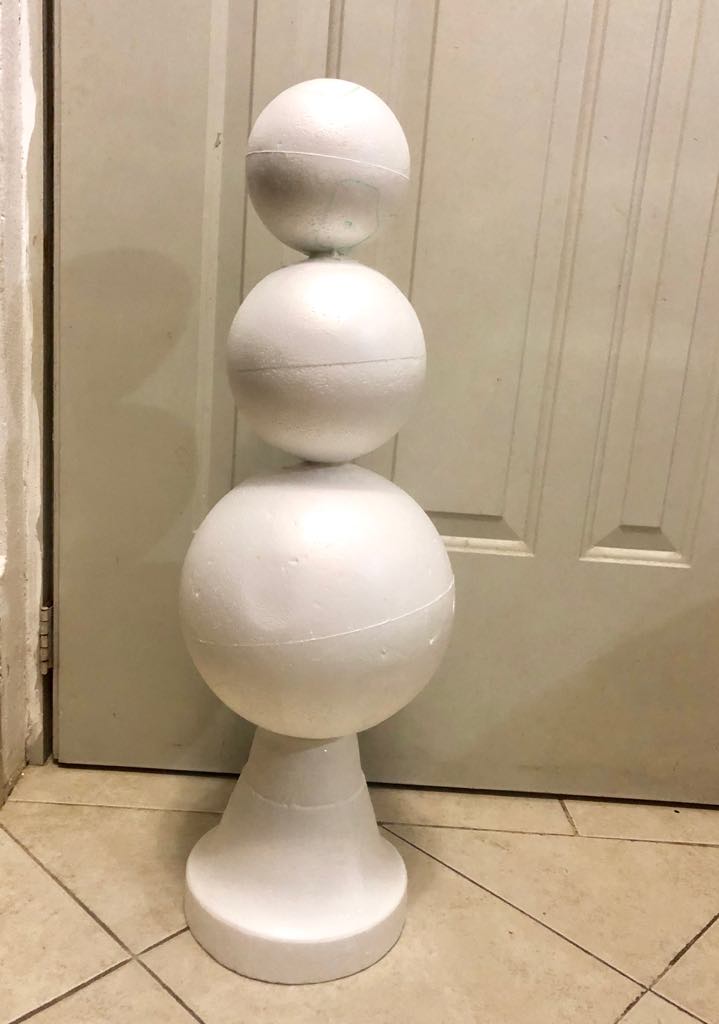
I added a fourth piece to our sandman (the large styrofoam bell) as a base just to give it a little extra height on the beach and to help weigh it down. I was imagining the whole thing blowing away on the beach because I know how windy it gets so I knew I wanted to anchor it down a bit. I cut the tip off of the top of the styrofoam crafting bell and glued the largest bottom “snowball” to that.
I left our Snowman to rest lying down and just used a little scotch tape to keep the pieces together.
Step #2-Sand
Get some sand! For us it meant we hopped in the car and literally drove to the beach just for sand for our Sandman. If you’re using natural sand from outside…just make sure you grab sand from the surface that’s nice and dry. We filled up an entire 5 litre jug just so we’d have more than enough to work with from home. I learned I didn’t need nearly as much as I thought I would in the end (maybe only between 1-2 litres because it’s all just going to act as a coating) so if you have some play sand or buy a small bag it would definitely be enough.
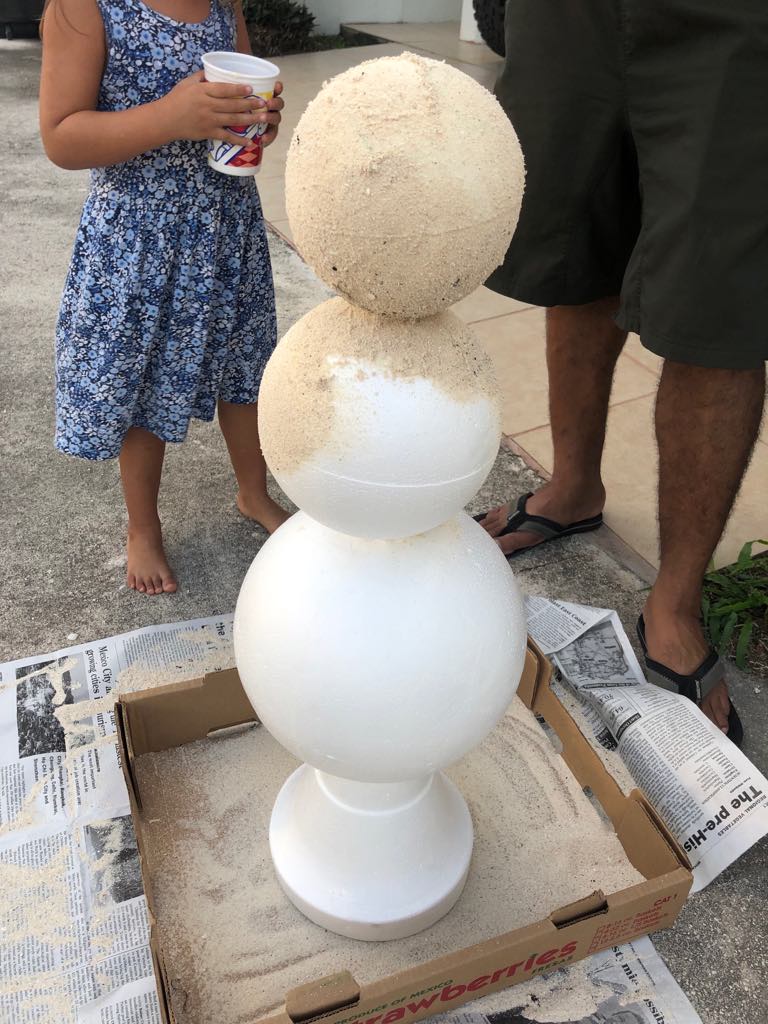
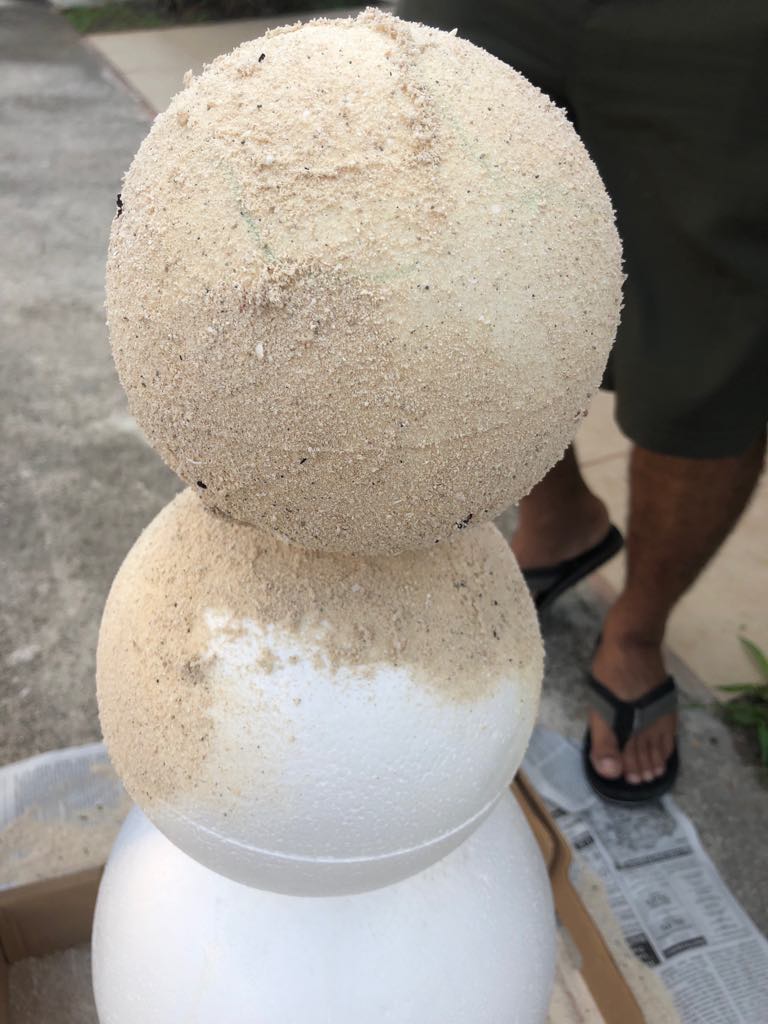
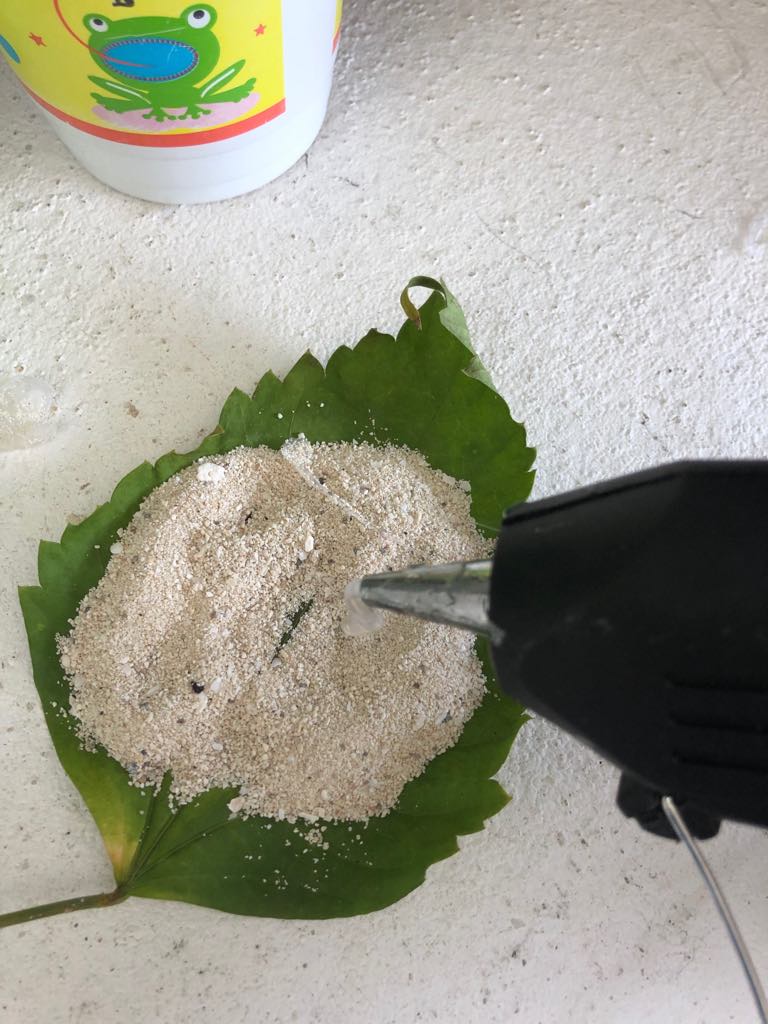
Step #3-Applying the Sand
Once our Sandman was securely fastened together it was time to coat it with sand. Outside we laid down some newspaper. We placed the Sandman in a box to catch the sand and section by section we sprayed on the spray adhesive. I filled small plastic cups with sand to make it easier to apply the sand and this became the perfect step for Isla to really help out with. It was her job to coat our Sandman with sand as we sprayed on the glue. As we went, we would just gently tap and shake the Sandman to ensure it was all sticking. We’d also recycle the sand that fell in the box scooping it up to pour back on. One coat of sand does a pretty good job at transforming it but I let our Sandman dry overnight and applied a second coat the next day.
Step #3-Adding the accessories & face
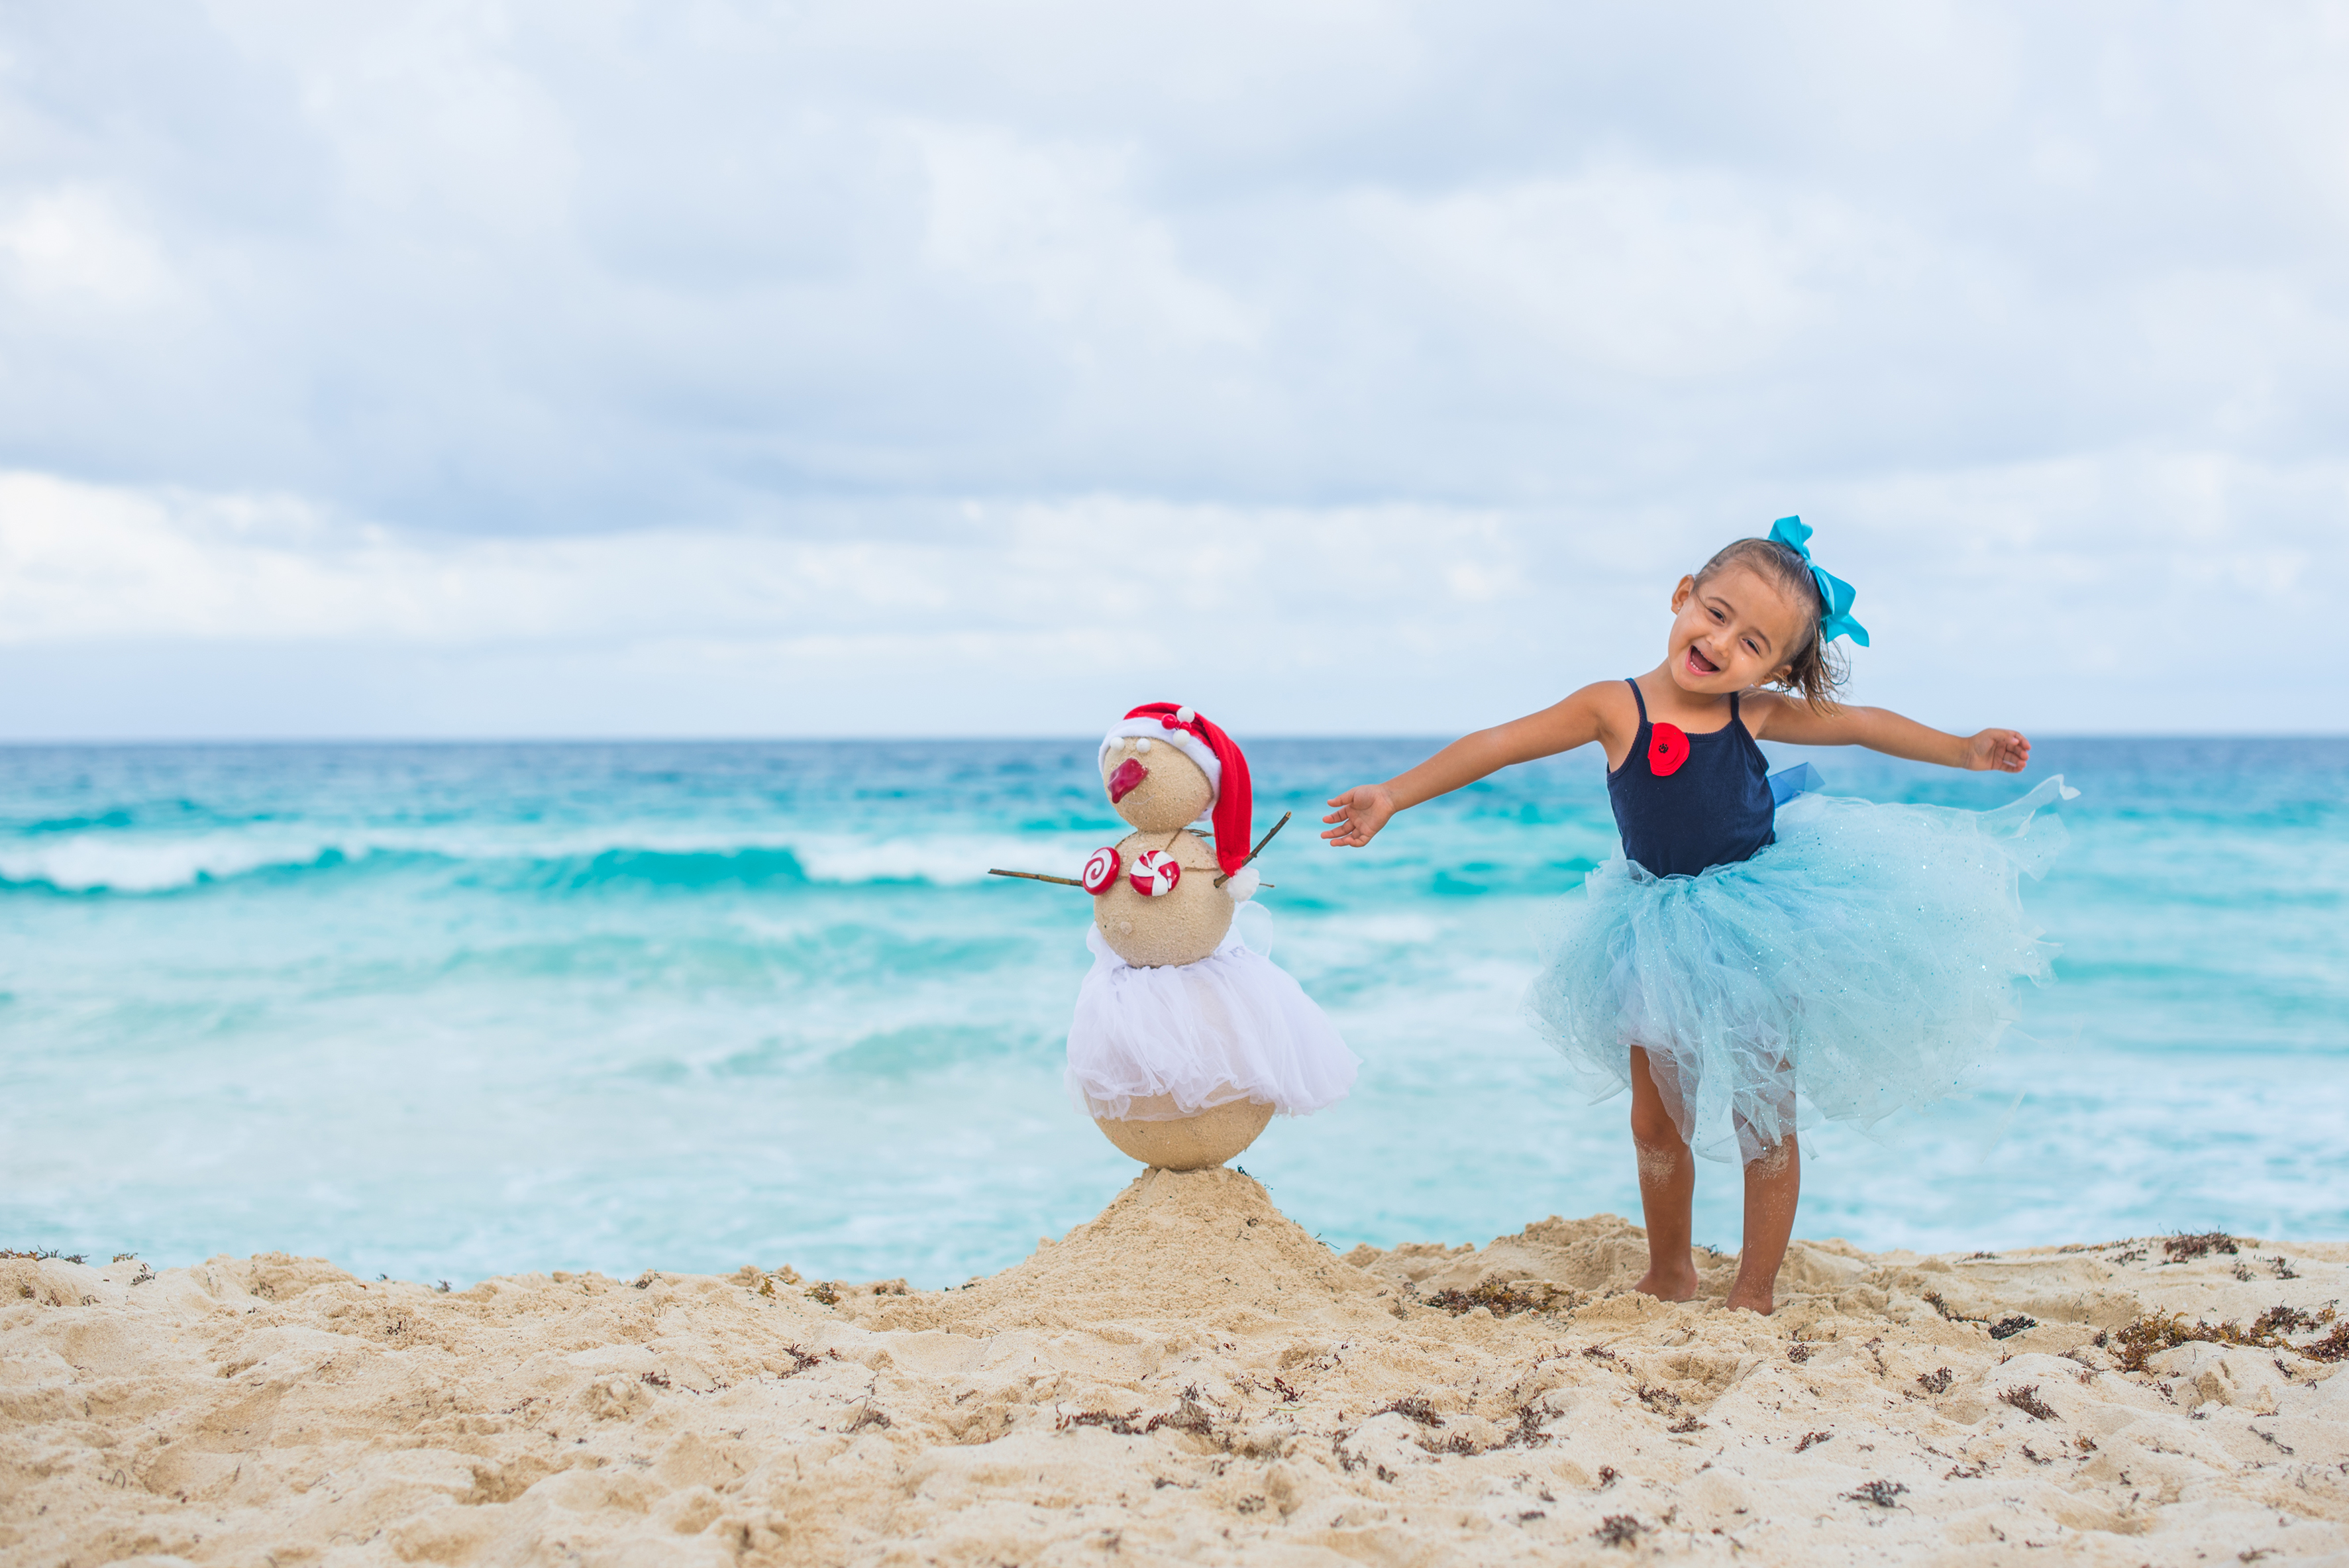
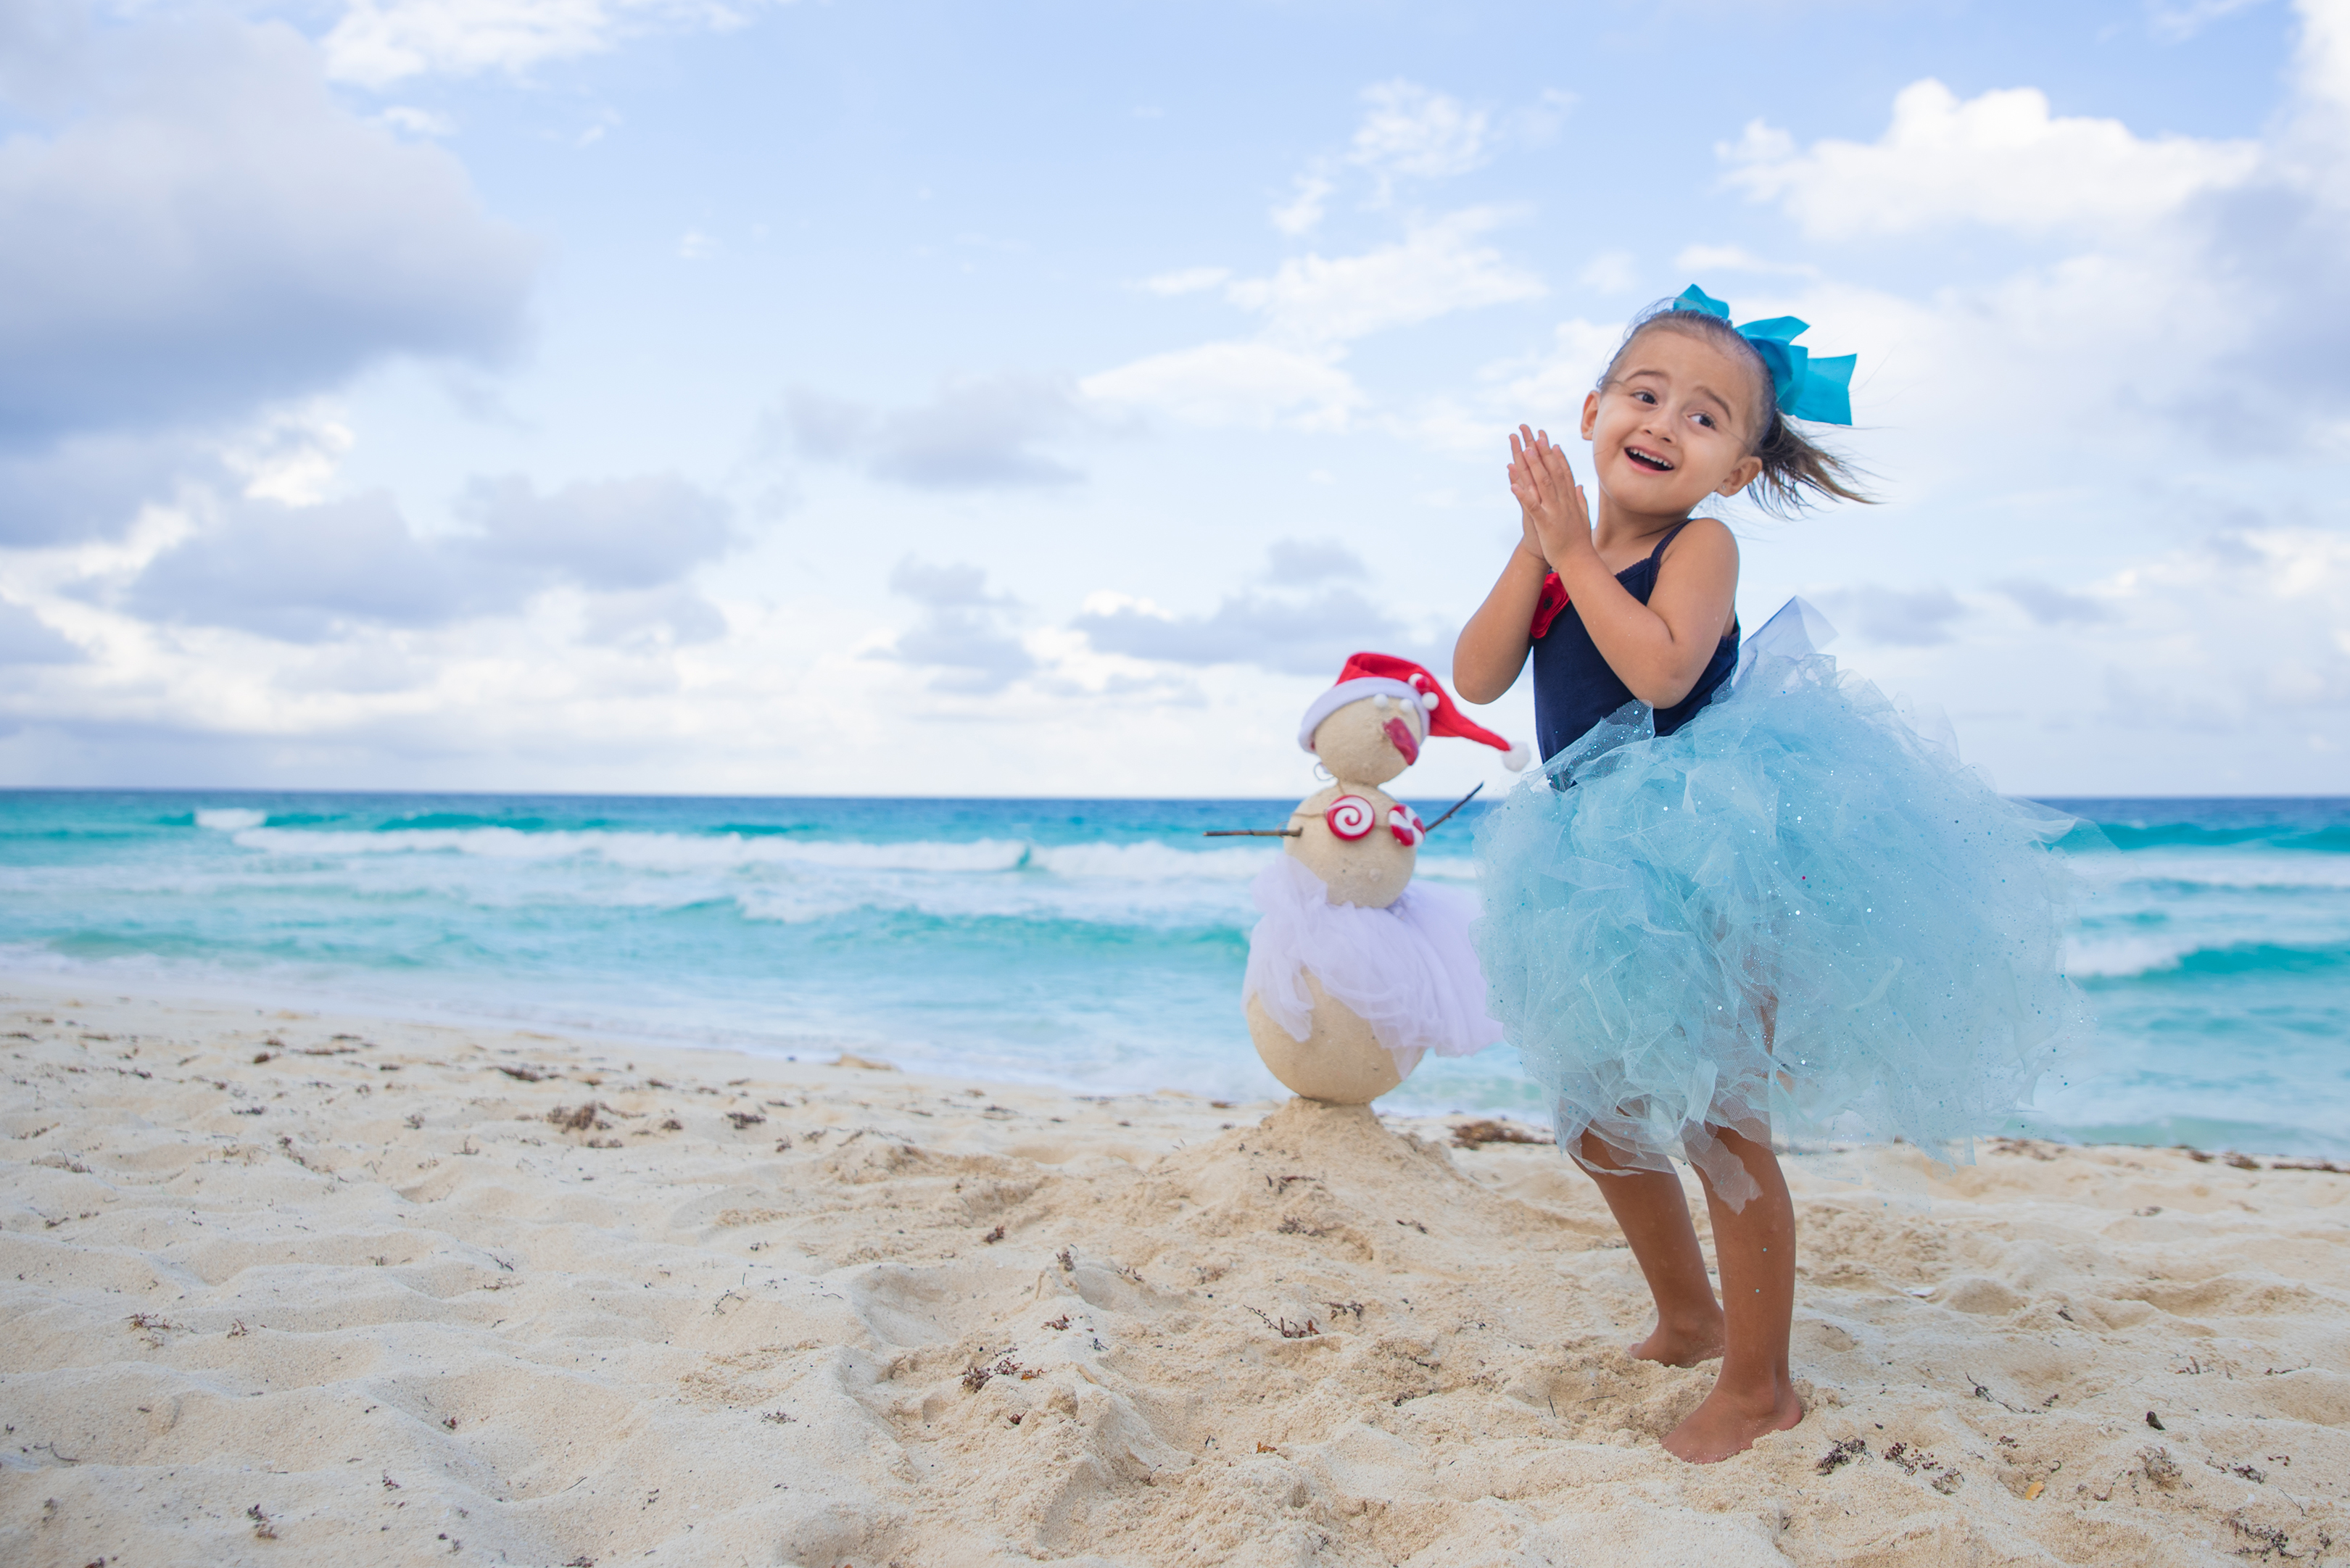
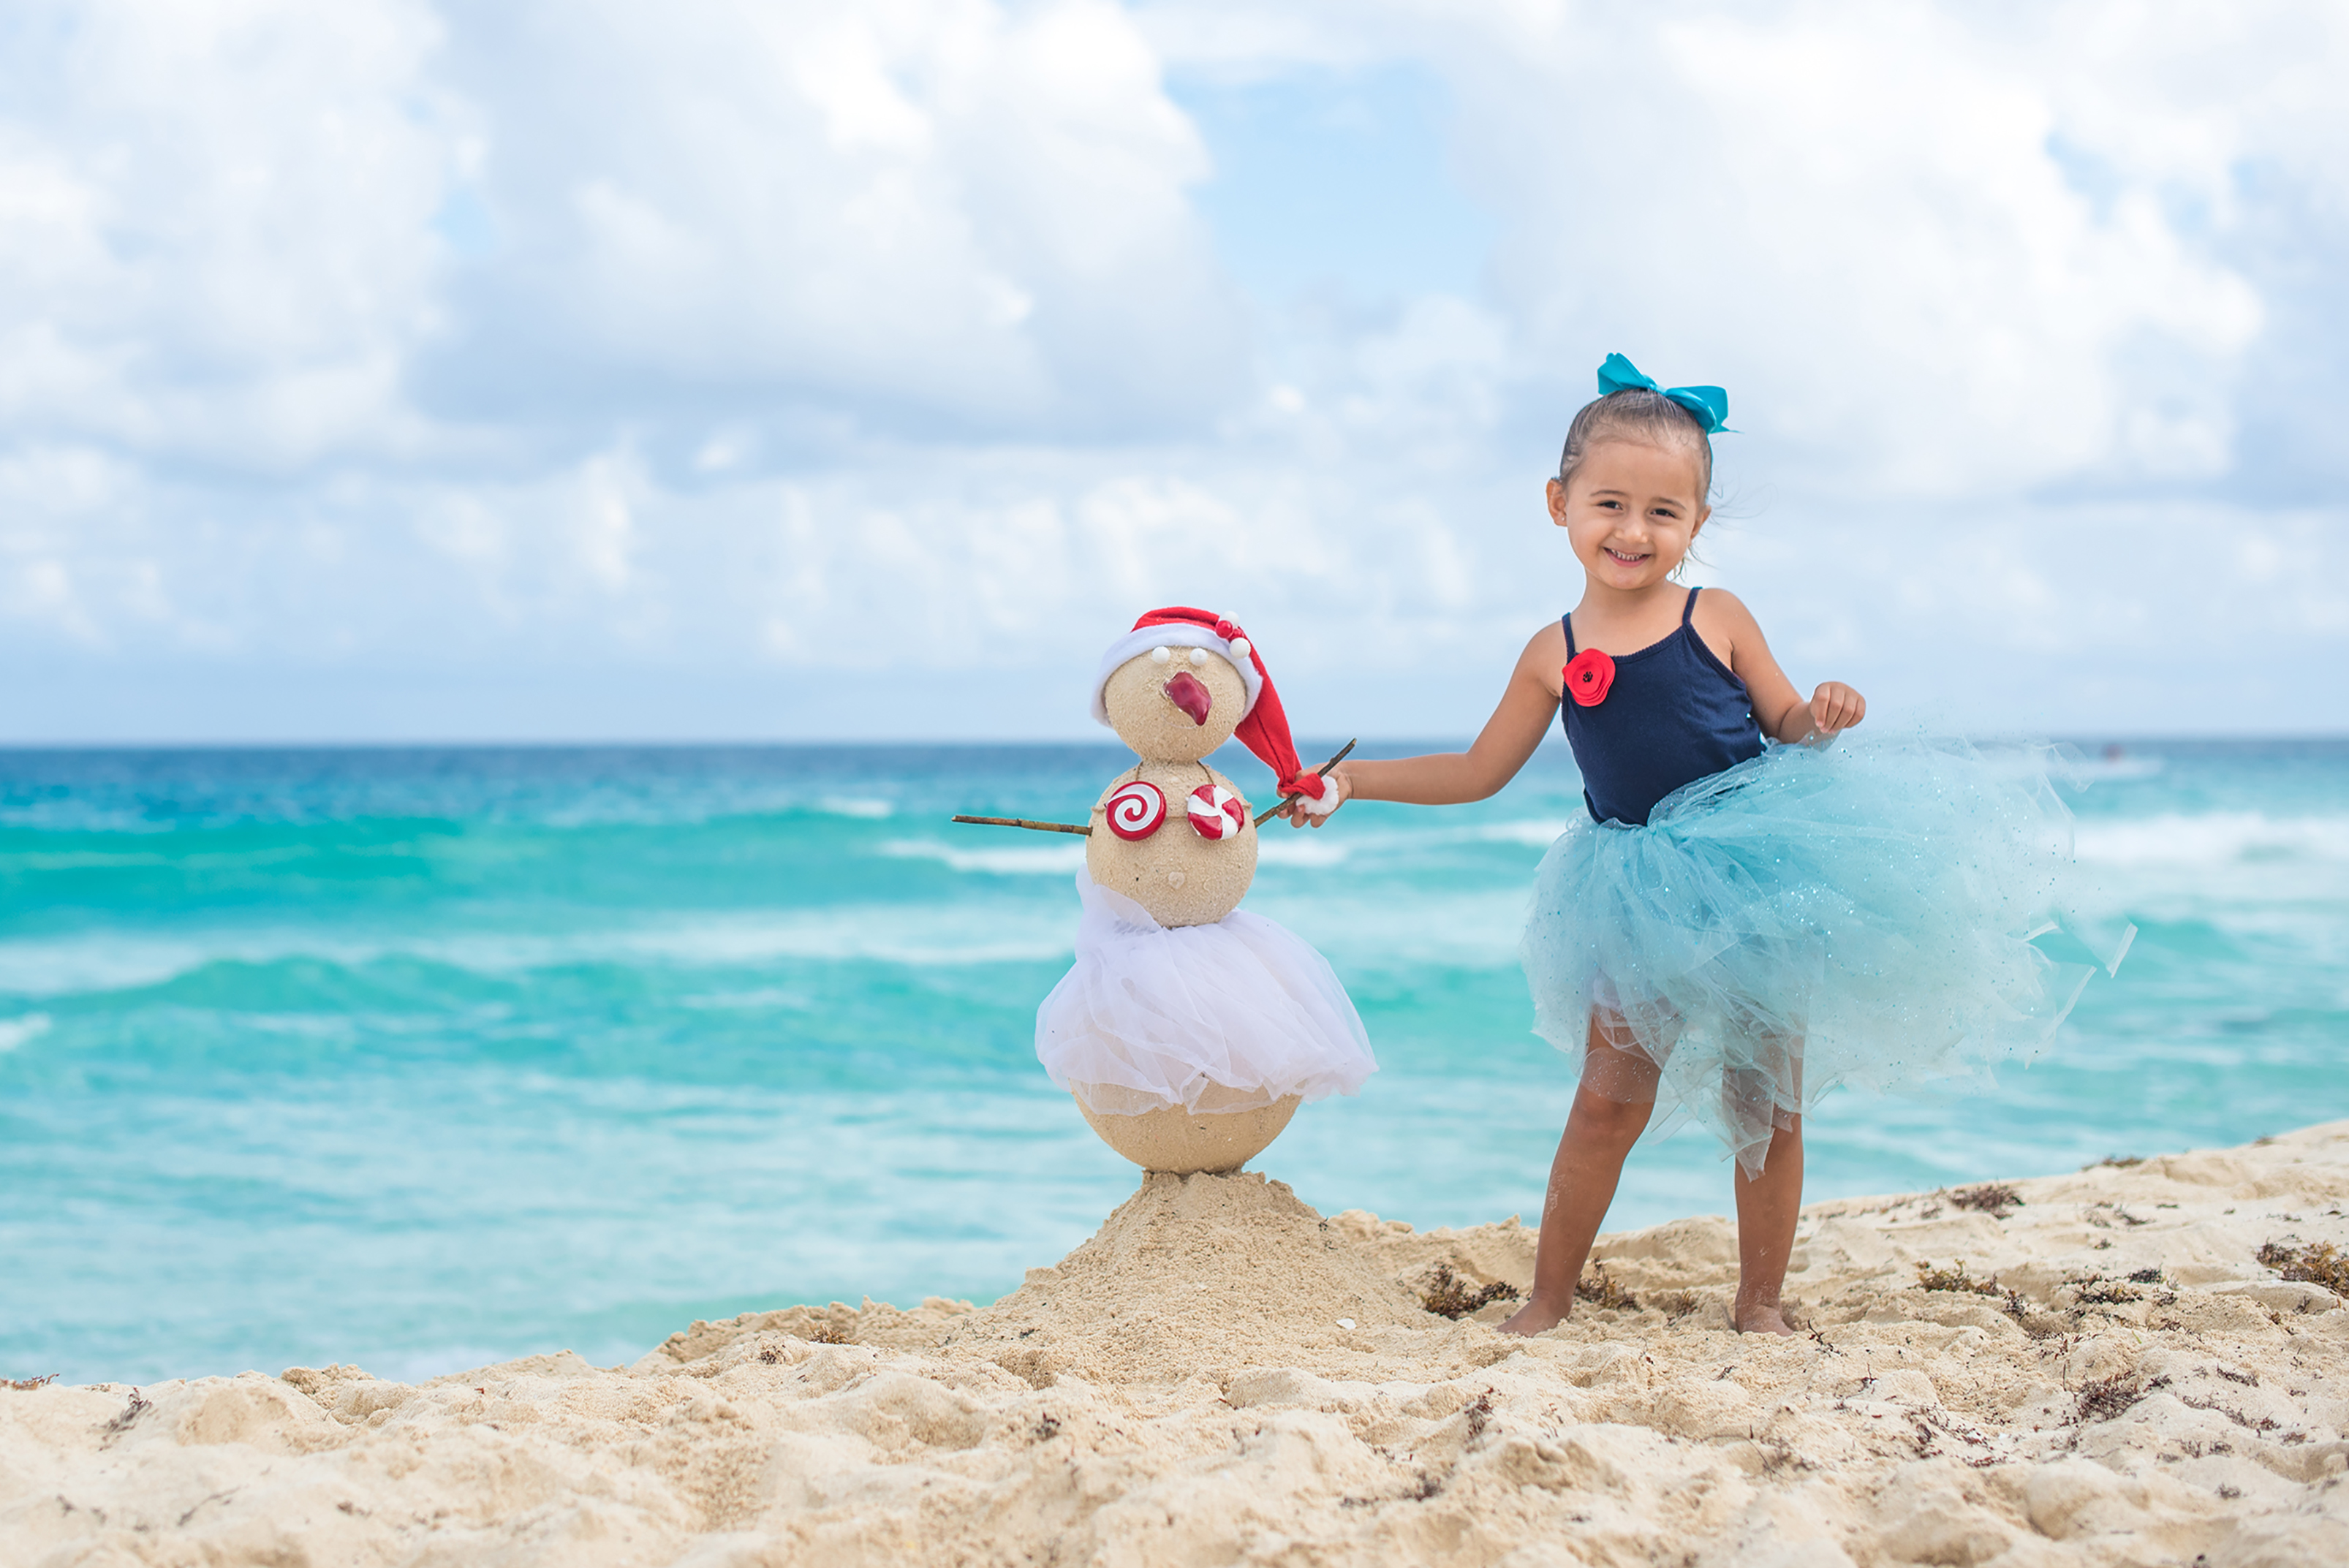
So just like a truly awesome crafting project…we made it all up as we went! I genuinely didn’t have a guide to follow or a perfect Pinterest worthy sample photo of what it was all supposed to look like so I was winging it. I had it in my head we were making a SandMAN and had a few accessories like a Santa hat, scarf & sunglasses to place on it. Low and behold my creative & opinionated little 3-year-old absolutely HATED how our Sandman was coming together (it did look terrible) and suddenly instead insist we make a SandGIRL! Well I 100% didn’t plan on making a Sandgirl but like a happy accident it all worked out better than I could have imagined. Proud crafting mom moment as it really was Isla’s idea to change it at the last moment and she wasn’t taking no for an answer!
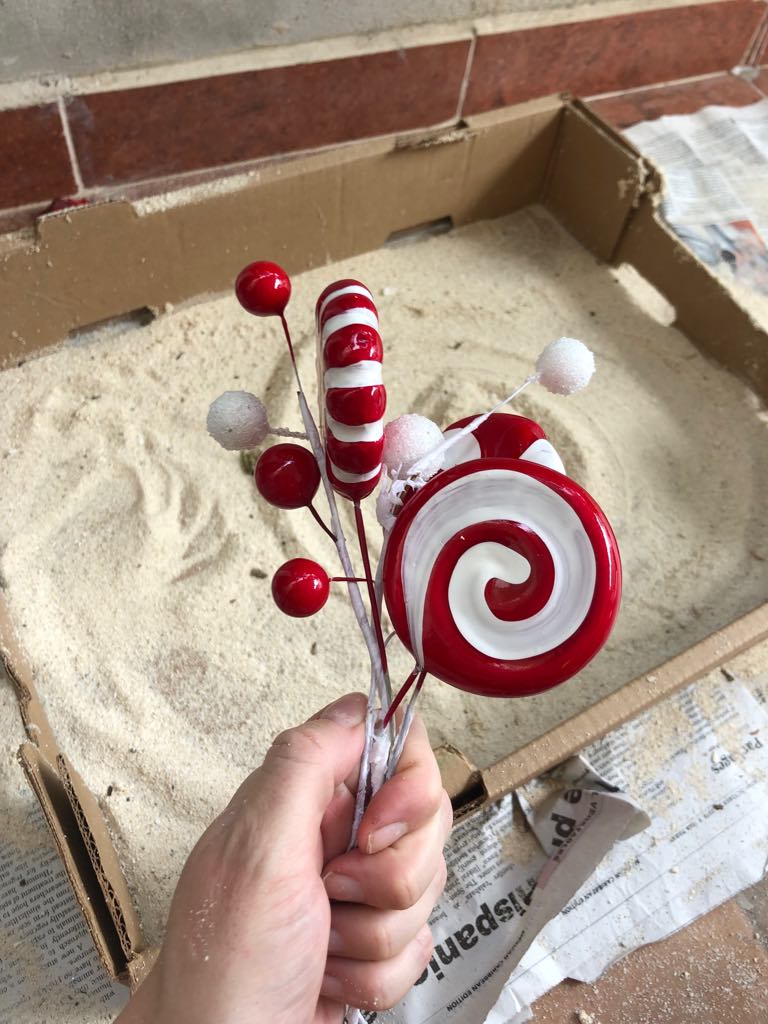
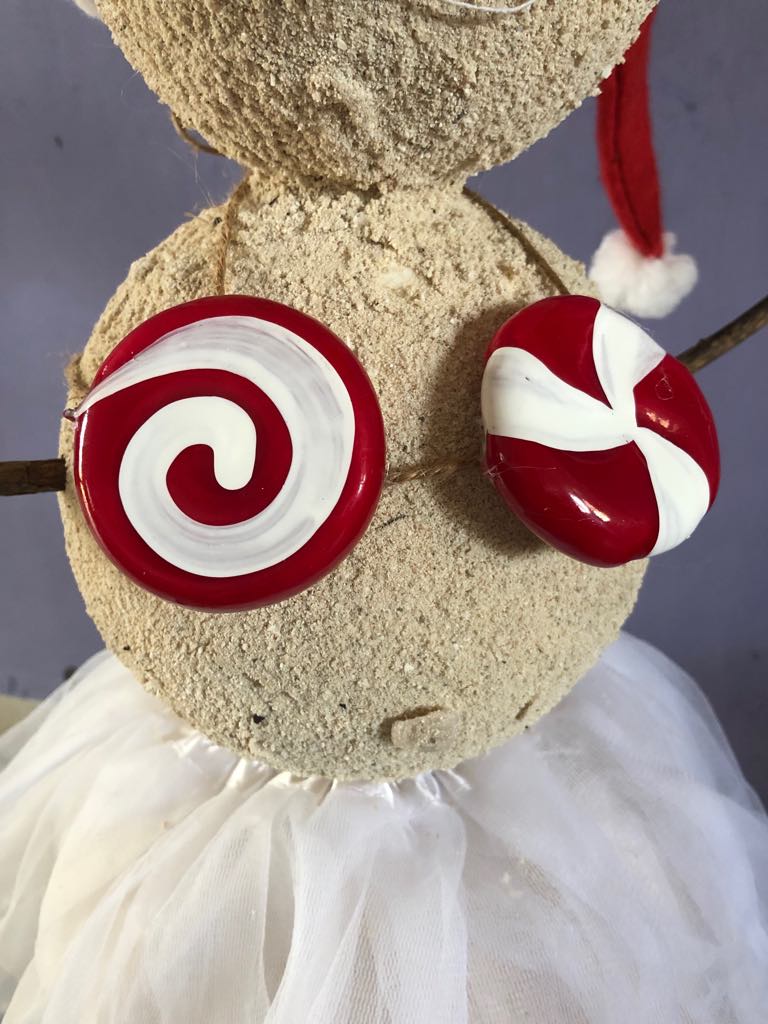
I had bought a cute red & white candy looking piece I thought we could possibly use as a prop to stick in the sand for the photos for a burst of colour or have the Sandman hold it or even my daughter. I had no idea why I bought that little Christmas crafting accessory but thankfully I did because it became an unexpectedly crucial part to our Sandgirl coming to life! With a little quick thinking I cut two of the larger pieces off to use as part of our Sandgirl’s bikini. Since each “candy” piece on the strand came on a wire I left just enough wire to help fasten it on by sticking the wire in then also using the glue gun to secure it.
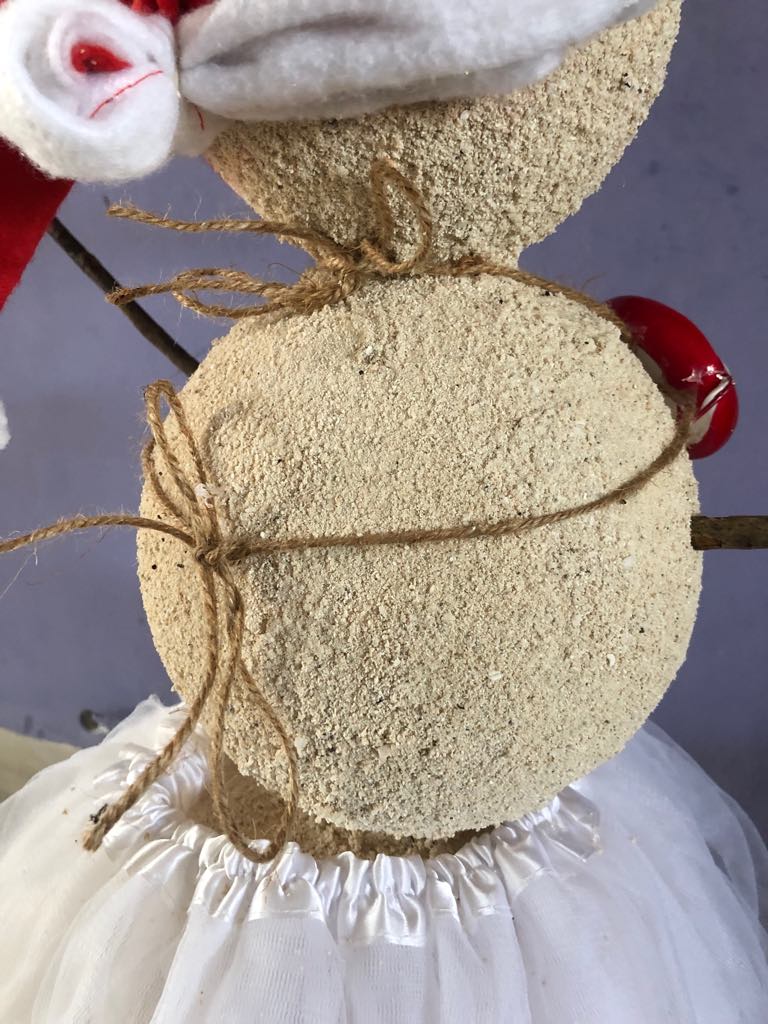
To finish off the bikini I glued/tied some jute twine in place around her body and up around the neck.
Since my cute red & white candy prop was being chopped up I figured I might as well take advantage of all of the pieces. I had the idea to use two of the smaller little white candy balls as eyes. I used the same method of sticking it in with wire and placing a little glue to help hold it in place. I cut a small piece of the white wire that the larger candy pieces were on to use as the mouth and I also put a few of the red & white coloured balls on the Santa hat.
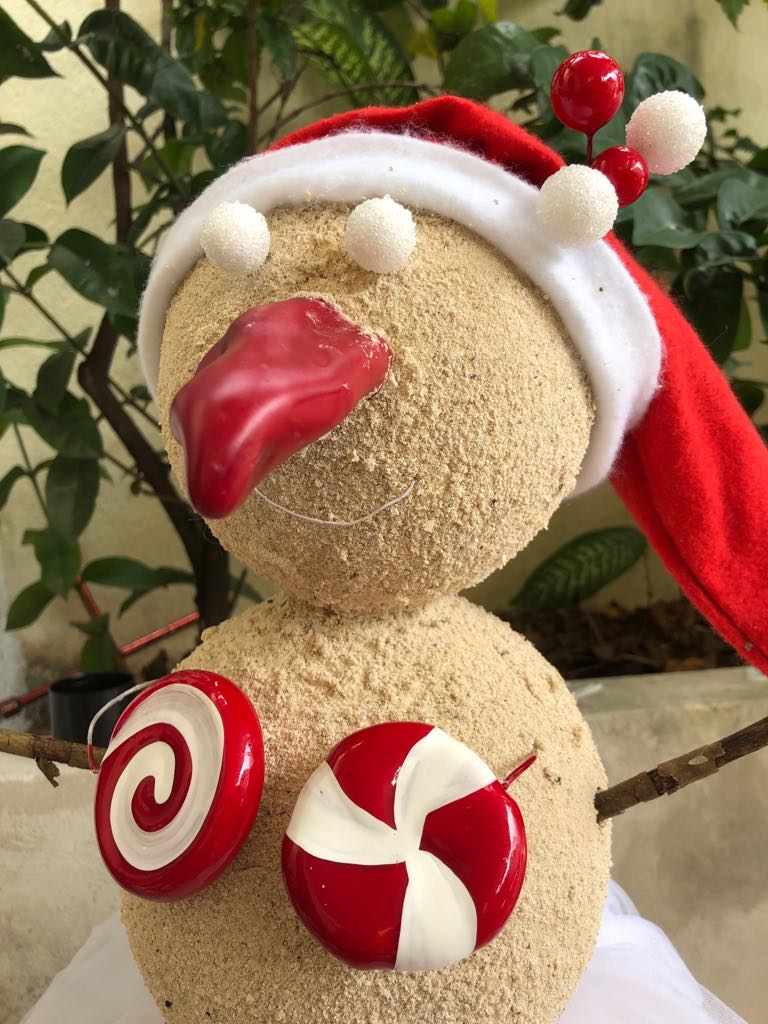
For the arms I just simply stuck them in place on either side. I cut the chilli pepper nose in half (which was actually styrofoam on the inside) and used a small piece of the wooden dowel along with hot glue to fasten it on.
Step #4-Making a bellybutton
Because we unexpectedly ended up with a Sandgirl in a bikini I felt the urge to now also make a belly button for her (as soon as I mentioned it Isla was beyond excited about the idea! lol). I squeezed a little glue from the hot glue gun into some sand quickly rolling it up to coat it and then put it in place.
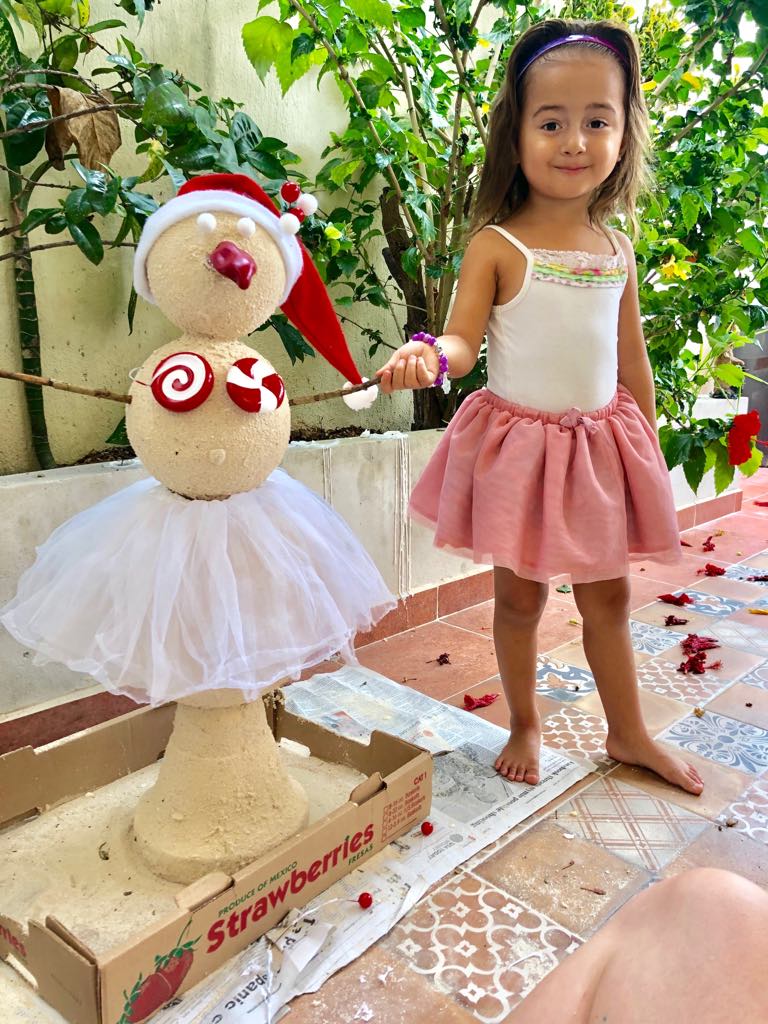
In the end Isla and I were both super happy with how our Sandgirl came out! She excitedly posed with her on the beach for photos proudly showing her off. I absolutely love these kinds of photos for so many reasons. For me it’s not only an adorable Christmas snapshot in time of my daughter at the age of 3 but it also perfectly captures her on our favourite beach with a special mommy daughter crafting project we really did create together!